Friday, 17 February 2012

Boba Fett Jetpack - Quaternary Phase

Time for a good old massive update!

In the time since the last update I've got a fair bit done on the sanding (floor is covered in dust again) and final cutting for the jetpack; the shape of it is near enough defined now. All that's left is some small sanding jobs, some glueing and a couple of hours with wood filler smoothing everything over and then sealing with PVA and painting.

I'm hoping to get the jetpack done fairly soon, but here are some pictures to accompany my rambling.


Picture of the rocket in most basic form. The plan at this point was to cut as close to the shape as possible and then sand down to form the cones shapes that really define the rocket on Boba's jetpack.


Just holding this part in place, this will be half way up the centre thruster when it's glued on, holding it on for now to give an idea of where it'll be in the grand scheme of things.


A couple of shots showing the jetpack's shape before the sanding of the caps on the side thrusters, the main thruster and rocket. They are only very roughly cut out at this point and still required a fair bit of work. As you might notice also, I've added some wooden 'caps' to the top and bottom for some stability and to hide the centre cavity. There's a wooden plate on the back so I can use a strong spirit based solvent to glue the jetpack onto the back armour plate, rather than use a weak glue on the foam.


The sanding is near finished on the rocket and main body here, the parts are currently in the stages of being glued together for final sanding touches and filler work. The fractal pattern on the final 'slice' of the main thruster is to reduce the amount of filler needed to make the cone shape, it'll end up being smooth in the end, just like the real main thruster on the jetpack.

For tomorrow I'll probably be working on finishing the caps for the side thrusters and starting filler and gluing work. I should also have some pictures of the armour which I've been painting in the next update to match the jetpack.

Till next time, cheers for reading!

Sunday, 5 February 2012

Boba Fett Jetpack - Tertiary Phase

Sorry for the wait on this update, I've been ridiculously busy trying to get this done along with sorting out my bike for bike polo, including some gaming related wheel covers which I might post up in the future (Wait for a rainy day).

Besides downgrading my bike, I hope the dust from this blue foam doesn't screw with your lungs, because I've been sanding it down like no tomorrow and it's everywhere, the floor, the roof, me! Literally, my jeans are more blue than black.

Anyway, the sanding does seem like a good alternative to using piping, but enough of my complaining, on with the progress.


The tubes for the side which were oblongs last week but I've sanded down so they fit flush and look like the thrusters. 


Here they are mounted on the sides, and I've cut the oblong shape of the main thruster and put it in the centre to give a sense of scale of the giant centre column,


Here it is sanded down after what seemed like an eternity sanding and staring at it wondering 'is it straight'? There's a tad of touchup work that needs to be done near the bottom with filler to make it a perfect curve, but other than that the sanding plan had gone pretty well so far!

All that's left to do now is add the complete cylinder on top of the centre column, add 'caps' to the side thrusters, make the rocket for the top and then touch-up and paint. Just hoping the snow has buggered by then so I can spray it outside! 

Till next time, cheers for reading!

Thursday, 19 January 2012

Boba Fett Jetpack - Secondary Phase

Another update on this beast of a commission, this thing is really turning out to one big piece of kit, half considering fitting it out with real thrusters to see if it'll get off the ground!

Anyway, hit a slight 'bump' with the tubing and ended up figuring it'd be easier to carve the half cylinders out of foam, that way the whole jetpack should be a bit lighter and hold together a lot better.


Here we've got the side panels near the centre cylinder added, there are going to sit flush to the main cylinder which I'm going to sand out of a thick wedge of foam.


I've now added the two wedges to the edge of the main body which I'm going to sand down to make the side thrusters. I've also decided to cut down on the number of layers of foam on the main 'body' which the tubes rest on. This is just because the backplate is considerably thicker than my measurements and cutting one layer of foam should balance this out nicely. 

I'll be taking some parts back to mine to sand them down so I can work on it over the weekend and fit them back in the workshop on Monday. The measuring and cutting is taking a fair bit of time but all is going to schedule and getting those two side thrusters done over the weekend should really get some momentum to the build coming together and the final shape should start coming together real soon.

Till next time, cheers for reading!

Thursday, 12 January 2012

Boba Fett Jetpack - Primary Phase

I've been waiting to start this for a while, it's a commission I've been very excited about but not been able to work on. This may be due to some fingers which may have got caught in a bike at work, but that's besides the point, they are now fixed!


I've begun work on a stage prop for Boba Fett's jetpack from Star Wars. For this prop, it wasn't necessary for complete accuracy or detail, all that was required was the correct basic shape; the iconic rocket, the block shape and the three tubes. Just a warning to any die hard Star Wars or Boba fans out there, this is most definitely not a 1:1 prop, but an approximation for a stage routine, but I hope you enjoy it all the same.


Anyway, enough backstory, on with the show!


This is the product of a first session measuring, marking out, cutting and finalising measurements for the backpack. I've drawn out most of the design onto the foam pieces and I've now just got to cut them out, taking my time with this because mucking up the measuring is really not an option!


This is the 'baseplate' of the jetpack as I've dubbed it. This is going to be backed in a thin layer of wood as the two porous surfaces will bond a lot better than foam to plastic. The wood is then going to be glued directly onto the back armour plate, making it a lot easier to take off and create a nice support for it.


This is my evil master plan as far as the jetpack goes. Plenty of pages before this, filled with unreadable scribbling and rough sketches but this is the master page I've been reading from. All my measurements and shapes are on this, so I've been keeping any coffee away from it, any spillages and I am in every sense of the word, screwed!


This is being made for a burlesque dancer's stage show, so the key idea was usability and lightness, so it can easily be taken on and off and not break, hence the simplified design and the main material being foam. The dancer in question is Manchester based called Leon Noir and an absolutely great guy, if you're ever in need of a burlesque dancer for an event or show, I can heartily recommend him, he's been fantastic to work on this project.


This is just the first update for the jetpack, I'll be updating the blog with it's progress as I make it and I'll hopefully be doing this for all future projects so you guys can get an idea of how the props go together and what goes into making them.


Cheers for reading, till next time.

Tuesday, 3 January 2012

Warhammer 40,000 Mechanicum Tome

Happy new year! Hope you've all had a fantastic year, have a great year ahead and had a brilliant new year's eve, so here is something for reminiscing from a good year ago.

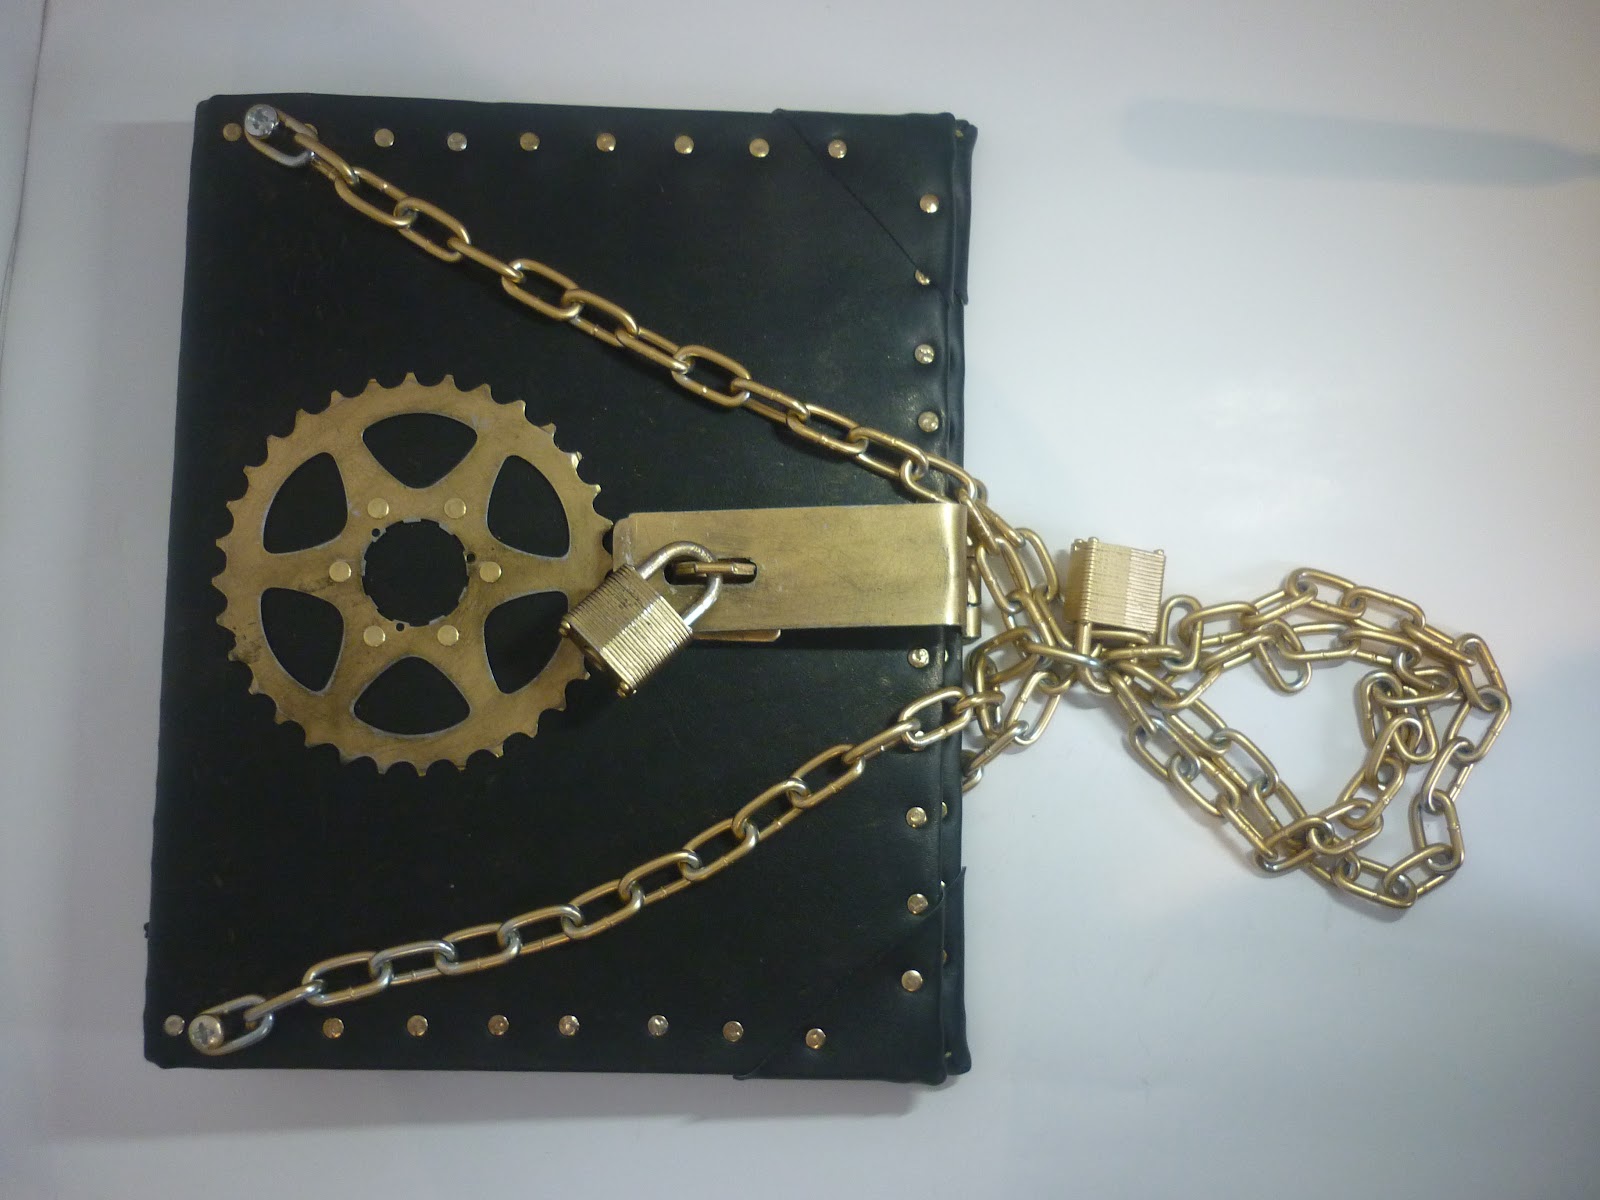
This is a commission of sorts I made a while back, the character it was for was a tech-priest from Mars from the Warhammer universe. This pretty much made the idea for this project for it to be as imposing and huge as possible as when you're mostly robotic weight isn't an issue.

His idea was a huge tome, something he could connect to his belt and carry around with him to look nice and menacing with a weathered look. With this info, I cracked on and as a huge fan of the Warhammer fiction, I'd got a few ideas floating around already.


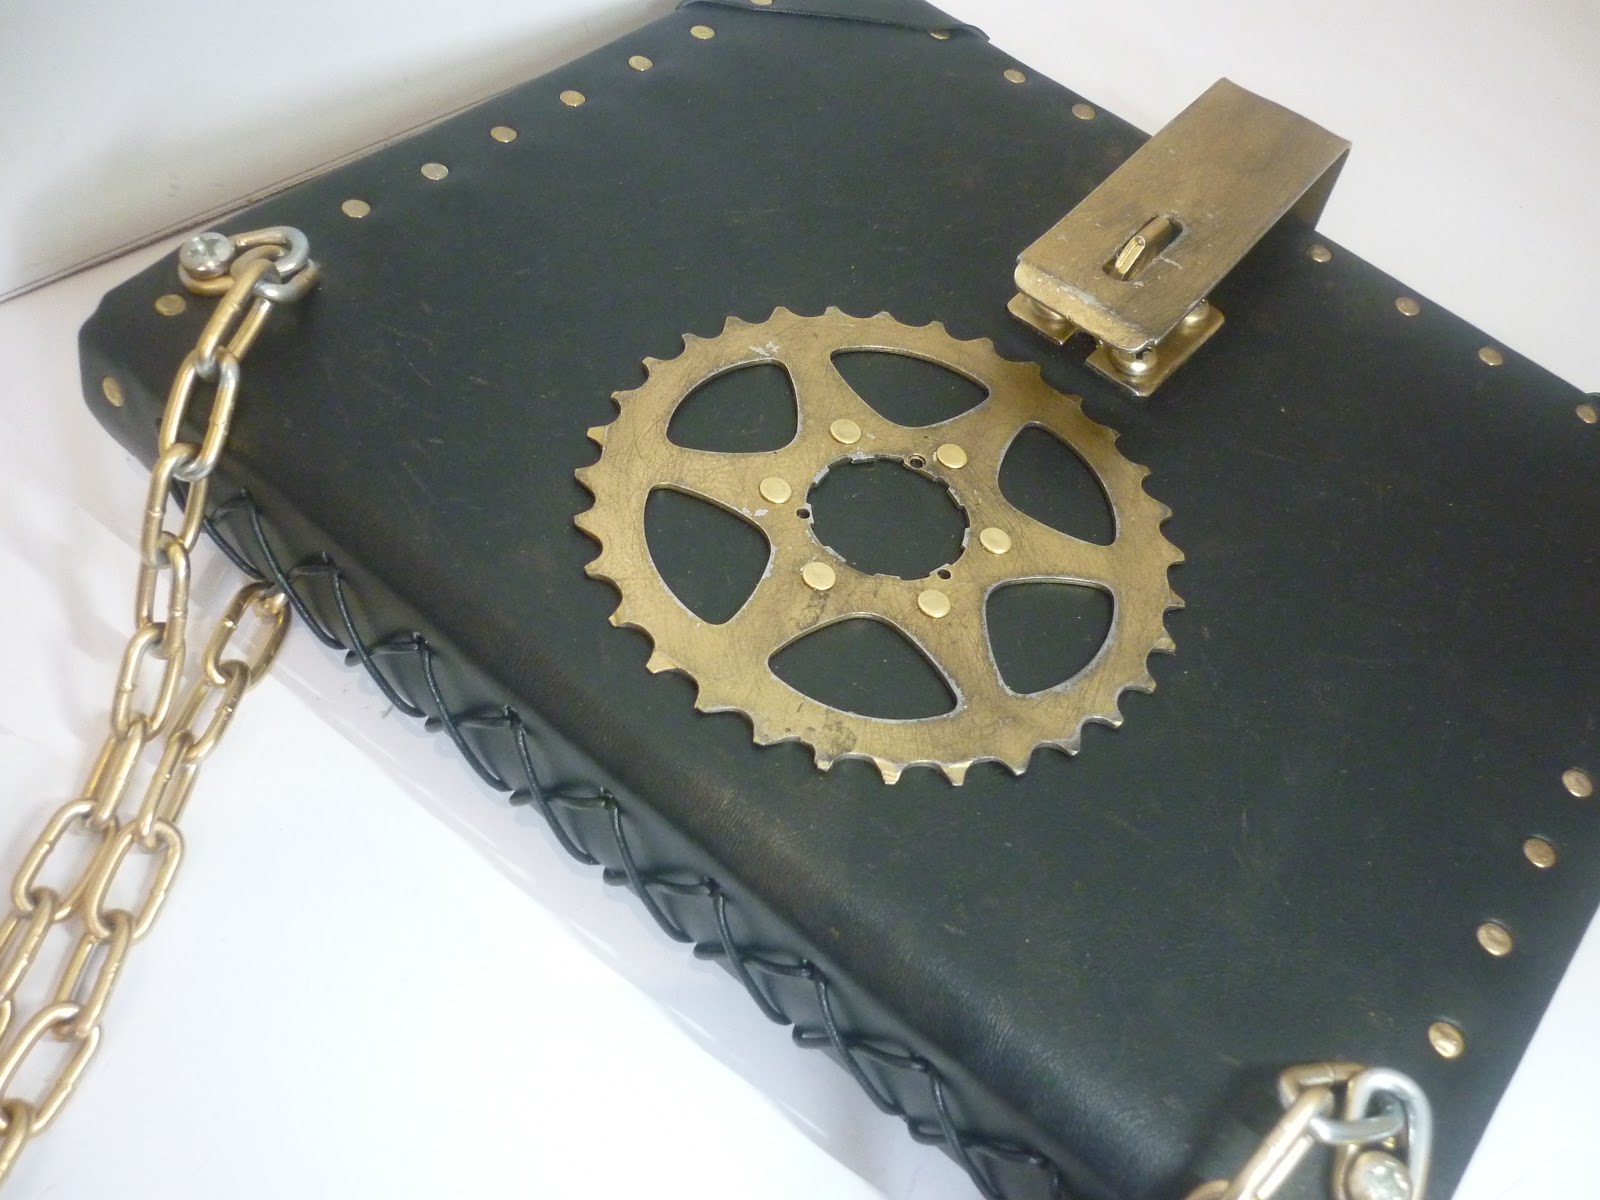
I decided to go for a fairly simplistic design for the front thanks to the Adepts at the Mechanicum basically being efficient robot men/things. I used a large sprocket from a bike cassette to stand as the cog emblem of the Mechanicum and riveted it to the leather bound ring binder folder I used as a base.


I lined the inside with velvet, held in place by both the hand stitching that runs around the border, and by the rivets. I decided to go with a rich red to match the decadence that seems to be a running theme in the 'grim far future' and to match the red planet!


To make it possible for him to lace the pages up (As he was providing his own) I laced some leather thonging up the spine to make it easy to put the pages in pretty quickly.


The corners of the leather cover weren't that pleasant, so to cover them up and provide a sort of finished feel to the tome, I added some leather corner pieces to add some detail.


To make sure it could be attached to his costume, I screwed on some large chains to provide that menacing look he was going for. These attach to another loop of chain with a padlock to secure it to anything like a belt or backpack.


To secure the whole thing, I added a large hasp onto the side, secured by a large padlock. This helped put some details onto the side as well as adding a nice solid look to the whole design.


Here you can see how it attaches to a belt, not an insubstantial prop I tell you, a thick belt definitely needed, but it fits the brief of 'solid' pretty well. I think it was someone on a steampunk forum who commented on it being 'Marley's chains', fits pretty well if I'm honest!

Lovely prop to make, lots of measuring into working out the size of leather to cut but the velvet came out really nicely in the end. Unfortunately, the guy I was making it for (a friend of mine) was unable to go to the event he was planning to use it for so I've still got it at home.

It's held up pretty well, only problem is that the paint has come off on the chains and scraped on the leather a bit, I'll get round to sealing the chain after a respray and get the paint off with some acetone or paint remover at some point in the future.

Until next time, cheers for reading.

Saturday, 31 December 2011

Electric Staff


Made this 'Electro Staff' for a costume for a competition down at Forbidden Planet. I added the lighting at somewhat short notice at the behest of a friend of mine, in his words "Hey, that would look great with a glowing thing on top!" Cheers Ian.

It’s made from steel and aluminium bike parts with a quartz crystal at the top mounted on a walking pole with a leather grip. Lots of copper wiring used in this, was going for a cobbled together science look with it.


This was my first attempt at doing something electrical inside, and as a combination of short notice and lack of soldering iron (Now rectified) the wiring is mainly held together with sticky tape with little or next to no insulation. 

However, it does give a lovely tingle when you turn it on! Since it was a personal prop that wasn’t so much of an issue though I have now discovered the joys of both solder and electrical tape. 

Thursday, 29 December 2011

Steampunk Goggles

Finally got round to setting up a blog, to get the ball rolling I'll post some of my earlier work up in the next couple of weeks just to get this place updated with my portfolio so I can start a running update of works in progress and inevitably some pictures of my fingers after snipping twenty tin cans apart.

To begin, here are some steampunk goggles, made from steel bike parts, hardened leather, plastic lens and leather elasticated straps, held with buckles.


One thing I've learned from making steampunk props is that working in a bike shop is the closest I'll ever get to a perfect job thanks to the scrap bin, heaps of metal and welding equipment lying around!